Podcasts are audio files that are distributed by RSS (Real Simple Syndication). This sounds complicated, but it’s actually quite simple. When you’re subscribed to a particular podcast, the audio files are downloaded automatically in the background, so that the latest episodes will always be available. This makes keeping up with the latest podcasts effortless. Most podcasts take the form of MP3 files, but any audio file format can be used.
In terms of content, podcasts range from simple spoken blog entries, usually created by individuals, to podcasts that are more akin to radio shows and involve interviews. Some professional radio stations even release entire shows as podcasts, with the British Broadcasting Corporation (BBC) leading the charge (www.bbc.co.uk/podcasts).
Banshee is able to handle podcast subscriptions under Ubuntu, and you can add a new subscription by clicking the Podcasts heading in the leftmost pane of Banshee. Then right-click a blank spot in the track listing area, select Add Podcast, and enter the URL. However, a much easier way of adding a podcast is to use Firefox to browse to the link.
Banshee works with podcasts that are provided via an RSS link. If such a link is provided for the podcast (usually indicated on a web site by the orange RSS button), after you click it Firefox will offer to subscribe to the link itself, using its Live Bookmarks feature (on some Podcast pages, you’ll already see a button to use Live Bookmarks). To change this behavior so that in the future RSS links will open in Banshee, click the drop-down link alongside Subscribe to This Podcast Using, and click Choose Application. A file browser window will appear, headed Choose Application. In the top left corner of this window there is an icon of a pencil. Click this, and a Location text box will appear below, within which you should type /usr/bin/banshee and click Open, as shown in Figure. The Choose Application window will disappear. Back in Firefox, put a check in the box alongside Always Use Banshee to Subscribe to Podcasts and then click Subscribe Now in the Firefox program window.
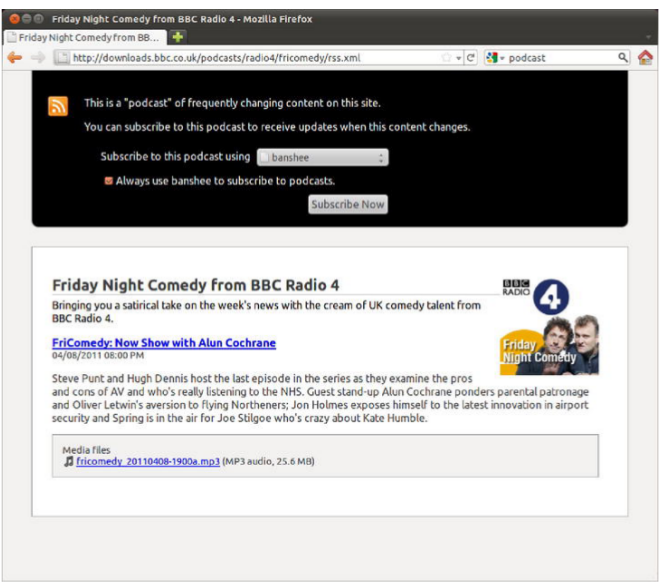
Figure . To make Banshee handle RSS podcast feeds that you click on in Firefox, you have to make a
slightly fiddly one-off change to Firefox’s preferences.
Listening to Audio CDs and Ripping Tracks
Playing back audio CDs is simple. Just insert the CD, and you should see a prompt asking which application you want to open the CD with. The two key choices are to open the CD in Banshee, which will enable playback and ripping of the CD tracks to disk, or to open the Brasero software, which lets you to copy the disc.
For simple playback, selecting Banshee is the best option. You can ensure that Banshee starts automatically in the future when you insert an audio CD by selecting the Always Perform This Action check box.
After Banshee has started, click the name of the CD in the leftmost pane (you’ll normally find the CD as the last item in the list) and then click the Play button on the toolbar. It might take a few seconds for the name of the CD to be looked up online and, provided you’re online, the track and artist information will be looked up automatically, so you should find a complete listing, and perhaps even an image of the CD inlay, within the bottom left of the Rhythmbox program window. If there’s album art, you can see it if you view the properties of a track or from the Sound menu. You can also see it from the bottom left of the program window or at the right of the slider by selecting View > Show Cover Art.
To cue backward and forward in the currently playing track, click and drag the slider on the right of the transport buttons.
To eject, select the CD from the leftmost pane and select Edit->Eject Disc or right-click the CD from the leftmost pane and click Eject Disc..
If you find that the track listing information is incorrect, as can sometimes happen with online lookups, you can correct it by right-clicking the track name and selecting Edit Track Information. Then type the correct details in the dialog box that appears.
Converting audio tracks on a CD into digital music files you can store on your hard disk for personal use is informally known as ripping.
Choosing a Format
You have several basic choices for audio file formats, the main ones being Ogg Vorbis, FLAC, and MP3. Let’s look at what each has to offer:
• Ogg Vorbis: This is the free software alternative to MP3. Unless you have a trained ear, you won’t be able to tell the difference between a Vorbis and an MP3 file. (If you do have a trained ear, you may find Vorbis better!) The two technologies generate files of around the same size, an average of 4MB to 5MB per song, though you may get a slightly better compression rate with Vorbis. The advantage of Vorbis is that it’s completely open source technology, so there isn’t the ethical burden of using patented MP3 software and, therefore, working against the interests of the open source software movement. The downside of Vorbis is that not all portable audio players support it (though many do, including players from SanDisk, Cowon, Bang & Olufsen, LG, and iriver—see the list at
http://wiki.xiph.org/index.php/PortablePlayers). Other operating systems like Windows will need some additional software installed if you want to play Vorbis files on them (see www.vorbis.com/setup).
• FLAC: This stands for Free Lossless Audio Codec, and it’s the choice of the audiophile. Vorbis and MP3 are lossy formats, which means that some of the audio data is lost in order to significantly shrink the file. FLAC doesn’t lose any audio data but still manages to compress files to a certain degree (although they’re still much larger than an equivalent MP3 or Ogg file). FLAC scores points because it’s an open format, like Vorbis, but you’ll face the same issues of support in portable audio players and other operating systems (unless additional software is installed; see http://flac.sourceforge.net).
• Speex: Originally designed purely for Voice over IP (VoIP), Speex was created for speech encoding. As such, it concentrates on audio frequencies generated during ordinary conversation. Aside from the fact that Speex is an open codec that claims to not employ any patented software methods, there really isn’t any reason to use it, even if you’re ripping speech tracks from a CD. It is built for transmission across low-bandwidth connections (or small file sizes). If hard-disk capacity is an issue, you might consider it, but Ogg and MP3 are better suited in virtually all situations. The Speex file extension is .spx.
• WAV: This is perhaps the oldest audio file format. It uses the .wav file extension, which you may have seen in use on Microsoft Windows computers. WAV files are usually completely uncompressed and lossless. However, that doesn’t necessarily mean they’re high quality; as with any kind of audio encoding, the sampling and bit rate can be set to any value desired. For example, Ubuntu includes a default .wav encoding profile of low quality that can be used when encoding speech. Although WAV files tend to be supported on most computing platforms, the downside is file size. Uncompressed WAV files can be massive, even those with low-quality settings. If uncompressed audio is your aim, FLAC offers a far better alternative.
• MP3: This is by far the most popular music file format, and practically everyone who owns a computer has at least a handful of MP3 tracks. This means software support for MP3 playback is strong, and of course, most portable audio players are built around the MP3 standard. The only problem for you, as a Linux user, is the issue of surrounding patents. Using the MP3 format goes against a lot of what the Linux and open source movement stands for. But in the end, the choice is yours. If you want to rip to MP3, make sure you have installed the Ubuntu Restricted Extras package.
Ripping Tracks
When you’re ready to rip some music, insert the audio CD and then start Banshee. Select the disc, as mentioned earlier in the directions for playing back audio CDs. The check boxes to the left of each listed track will automatically be checked. Uncheck any tracks that you don’t want to rip. Now right-click the disc under the devices heading and select Import <Album name>, or alternatively you can click the Import CD button on the main toolbar. By default, the tracks are ripped into ogg. To change it to MP3, you need to right-click the CD and select Audio CD Preferences. Under the Source Specific tab, change Import format from Ogg Vorbis to MP3 (Lame Encoder). It’s possible to play the audio CD while you rip it, but in our opinion that’s best avoided!
As the tracks are ripped to your hard disk, you will see a progress display at the lower left of Banshee. Audio tracks will be saved in a directory named after the artist and album title, within your Music folder in Places.