Evolution offers several features that can help you to organize your e-mail. You can create new folders, as well as filter, sort, and search through your messages.
Creating New Folders
If you want to better organize your e-mail, you can create your own folders, which will then appear in the list on the left side of the program window.
To create a new top-level folder, which will appear in the list alongside the standard folders (Inbox, Junk, Outbox, etc.), right-click On This Computer and select New Folder. Then make sure that On This Computer is selected in the folder view of the dialog box that appears. Type a name and click Create. You can also create second-level folders, which will effectively be “inside” other folders and will appear indented below their parent folder within the list. For example, you might want to create a series of folders within the main Inbox folder to sort your mail from various individuals or organizations. To do this, right-click Inbox, select New Folder, and give the folder a name in the dialog box that appears, as shown in Figure. After the new folder has been created, click the chevron next to Inbox to expand the display to show your new subfolder.
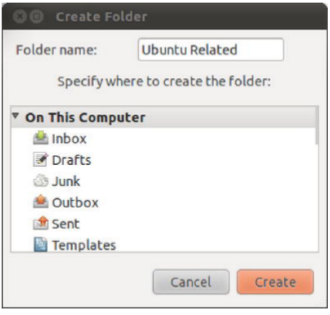
Figure . You can create your own folders to better organize your mail.
You can then drag and drop messages into the new folders, or you can simply right-click them, select Move to Folder, and select the folder from the dialog box that appears. This can be useful if you wish to select a handful of messages by holding down the Ctrl key. All you need to do then is right-click one of them and select Move to Folder.
You can also copy messages from one location to another, thus producing two copies of the same message. Simply right-click the message, select Copy to Folder, and select the folder from the list. Alternatively, you can hold down the Ctrl key while you drag the message to the new location.
Dealing with Junk E-Mail
Evolution includes intelligent junk mail filtering. Any mail that Evolution thinks is spam or junk mail will end up in the Junk folder. When you first start using Evolution, you should check the folder regularly, because there’s a chance Evolution might have made a mistake. However, this is a good thing, because by right-clicking the message and selecting Mark As Not Junk, the Evolution junk mail filter will be able to better understand what to consider as junk in your particular Inbox.
In a similar way, if you find that Evolution misses junk e-mail, and it ends up in your Inbox, you can right-click it and select Mark As Junk. Alternatively, select it and click the Junk icon on the main toolbar. To empty the Junk folder, select all the messages (Ctrl+A), right-click, and select Delete. Bear in mind that, as with any folder, after the messages are deleted, they will appear in the Trash, and you can restore them from there if necessary.
Sorting and Filtering Messages
You can filter incoming messages according to practically any criteria, including who sent the message, its subject line, words within the body of the mail, its size, and whether it has attachments. Coupled with the ability to create folders, this allows you to automatically sort messages as soon as they’re received. To set up filters, click Edit ➤ Message Filters. Click the Add button and, in the Rule Name box, start by giving the new rule a descriptive name by which you’ll be able to recognize it in the future. You might think this isn’t important, but you may create tens, if not hundreds, of filters, so being able to identify filters will be very helpful.
As shown in Figure, the Add Rule dialog box is split into two halves: Find Items That Meet the Following Conditions and Then. As implied by the labels, if the selected conditions are met, then the selected actions will take place.
The Find Items part is used to identify the mail. You can select to filter based on almost any criteria, such as who appears in the Sender field of the message, words that appear on the Subject line, the date sent, and so on. Simply select what you require from the drop-down list directly beneath the Add Condition button. In most cases, you’ll then need to specify details for the filter. For example, if you select to filter by the address of the individual sending the e-mail, you’ll need to provide that e-mail address.
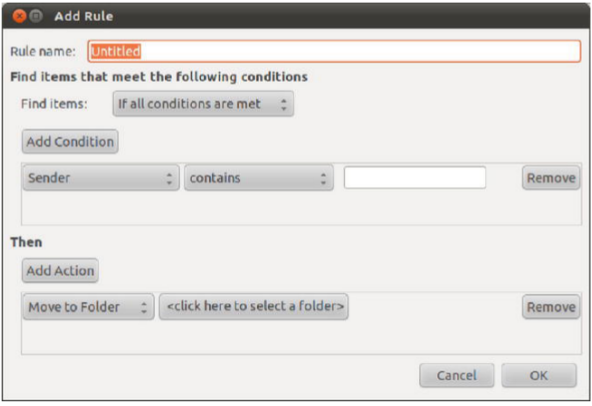
Figure . Creating message filters lets you automatically organize your e-mail as soon as it’s received.
After you’ve set the Find conditions, you need to select from the Then section of the dialog box. This tells Evolution what to do with the filtered mail. The obvious course of action is to move the e-mail to a particular folder, which is the default choice, but you can also delete the e-mail, set a particular flag, beep, or even run a particular program! As with the rules for finding items, you can set more than one condition here, so you can have Evolution beep and then delete the message, for example. When designing filters, it’s good practice to finish with a Then option of Stop Processing because one message may be filtered into a folder and then have other operations performed on it.
Creating Search Folders
Evolution’s search folders feature is a more powerful alternative to message filters. Using search folders, you can filter mail based on a similar set of criteria, but you can choose to include messages in the results that might be associated with the filtered messages. For example, if you choose to filter by a specific individual’s e-mail address, you can choose to have any replies you sent to that person included in the results, rather than simply messages received from her. In addition, you can apply search folders to specific e-mail folders on an ongoing basis, rather than all incoming e-mail.
It’s important to note, however, that a search folder isn’t a filter. The messages aren’t moved into the new folders. They stay where they are in your Inbox (or any other folder they might be contained in). Despite the name, search folders are actually little more than saved searches. They just act like filters. However, search folders are dynamically updated—if a message is deleted from the Inbox folder, for example, it will also stop appearing in any relevant search folder.
You can create a new search folder by clicking Edit ➤ Search Folders and then clicking the Add button. As with creating message filters, clicking the drop-down box beneath the Add button will let you select filtering criteria. The choices are broadly similar to those for message filters, in that you can filter by e-mail address, size of e-mail, message body, and so on. At the bottom of the dialog box, you can choose to search specific folders (the default), all local folders, or all active remote folders (which includes any of your mail stored on a server elsewhere).
In the Include Threads drop-down box, you can select what kind of results you would like the search to return:
• None simply returns e-mail messages matching the criteria.
• All Related returns every single message that is associated with the criteria.
• Replies returns results that include replies to the messages returned via the filter.
• Replies and Parents returns results that include replies and also any initial message that you or others might have sent that inspired the message included in the filter results.
• No Reply or Parent returns results that include only initial messages sent to you. Search folders results are listed under Search Folders on the left side of the Mail mode window. The search folders feature is very powerful and worth spending time investigating.