Evolution includes a powerful contact manager component that can catalog information about individuals. At its most basic, the contact manager stores e-mail addresses for use within the e-mail component of Evolution, but you can enter significant additional data about each individual, including addresses, phone numbers, fax numbers, and even a photograph for easy identification. This should allow Evolution to become your sole personal information manager.
To switch to the Contacts mode, click the button at the bottom-left side of the program window. Once in the Contacts mode, you can view information in several ways. Click View ➤ Current View to choose from the following views:
Address Cards: This is the default view and shows the contacts as virtual index cards arranged alongside each other at the top of the program window. Click the scrollbar beneath the cards to move through them.
List View: This shows the contact information as a simple list, arranged vertically, with various elements of the contact’s personal information listed alongside, such as phone numbers and e-mail addresses.
By Company: This organizes the data in a similar way to List view but sorted by the company the contacts work for (if such data has been entered into the contact entries).
Adding or Editing Contact Information
By far, the best way of initially building up your contacts list is to right-click an e-mail address in the header of the messages in your inbox, and select Add to Address Book. Make sure the address book selected is Ubuntu One if you want your contact information to be synchronized to your personal space in the Internet; read the next chapter to learn more about this service. This will add a simple contact record consisting of the individual’s name and e-mail address.
When using Microsoft mail applications, simply replying to an e-mail from an individual is enough to add that contact to your address book. Evolution is capable of this behavior too, but the feature isn’t activated by default. To set this up, click Edit ➤ Preferences, click Mail Preferences on the left side of the dialog box, and click the Automatic Contacts tab. Next, put a check in the box marked Automatically Create Entries in the Address Book When Responding to Messages. From the Select Address Book for Automatic Contacts drop-down list, select Personal. In the same dialog box, you can synchronize contacts from the Pidgin instant messaging client so that Evolution is brought up to date with your Pidgin contacts, and vice versa. You can then edit the contact details by double-clicking the entry in Contacts mode. This will let you enter a variety of information, as shown in Figure 14-9. To import a photo for this contact, click the top-left icon. You can use any picture here, and you don’t need to worry about its size, because it will be resized automatically by Evolution (although its aspect ratio will be preserved). The imported photo will appear in the lower area of the Contacts window when you click the contact’s name.
If you add a new contact and the details are substantially similar to those of another contact already on the system, the software will give you the opportunity to merge the two contacts into a single profile.
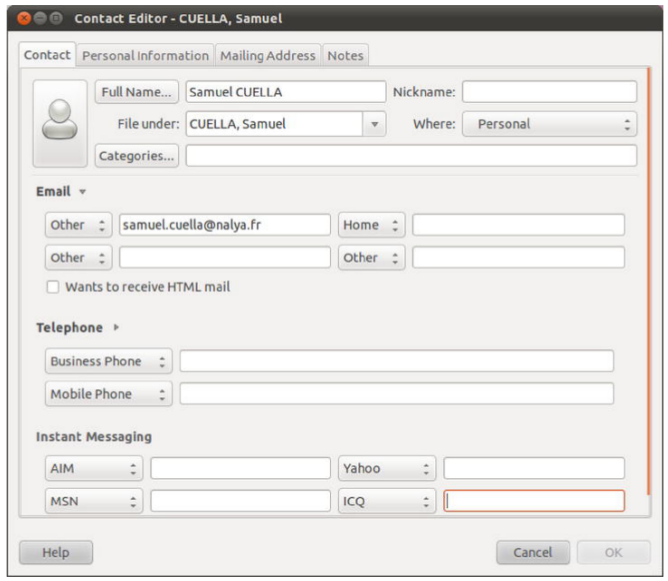
Figure . A lot of information can be entered for each contact, and, by clicking the button at the top left,
you can also add a photograph.
Creating a Contact List
Contact lists are simply lists of e-mail addresses. After a list is created, you can right-click its entry in the contacts list, and then choose to send a message to the list or forward it to someone else as a vCard. The obvious use of contact lists is for sending e-mail messages to a particular group of people.
To create a contact list, click the small down arrow next to the New button in Contacts mode, and select the option from the list. Give the list a name in the relevant box, and simply click and drag contacts from the main program pane onto the bottom of the Contact List Editor pane. This will automatically add their names and e-mail addresses. Alternatively, you can type their e-mail addresses manually into the field under the Members heading, and then click the Add button, which can be useful if the individual isn’t in your contact list. By selecting the Hide Addresses When Sending Mail to This List check box, you can ensure that the e-mail addresses are added to the BCC field of a new message, so people on the list don’t see the others on the list.