Evolution’s e-mail functionality is arguably the heart of the program. Although it offers many features, it is quite simple to use. If you’ve ever used any other mainstream e-mail client, such as Microsoft Outlook, you have a head start.
Configuring E-Mail Access
Before starting, you’ll need to find out the addresses of the mail servers you intend to use. In the case of POP3 and IMAP mail accounts, you’ll need to know the incoming and outgoing server addresses (outgoing may be referred to as SMTP). In the case of Microsoft Exchange, you’ll need to know the Outlook Web Access (OWA) URL and, optionally, the Active Directory/Global Address List server. With Novell GroupWare, you’ll simply need to know the server name. You’ll also need to know your username and password details for the incoming and possibly outgoing mail servers.
After gathering the necessary information, follow these steps to configure Evolution:
1. Start the Evolution e-mail client by clicking the little envelope beside the date and time, and selecting the Set Up Mail option. Alternatively, you can choose Applications ➤ Office ➤ Evolution Mail and Calendar.
2. When Evolution starts for the first time, you’ll be invited to enter your configuration details via a wizard. Click the Forward button.
3. The next screen offers an option to restore Evolution settings from backup. This is a convenient option for migrating accounts from one Evolution client to another. Because this is your first time using Evolution, you can simply ignore this option by clicking the Forward button.
4. You will be asked for your name and the e-mail address you wish to use within Evolution. These are what will appear in outgoing messages. Beneath this is a check box that you should leave selected if you want the account you’re about to create to be the default account. In nearly all situations, this will be the correct choice. You can also fill in the Reply-To and Organization information if you wish, but these fields can be left blank. They’re not usually displayed by most e-mail clients. Click the Forward button to continue.
5. The next screen asks for details of the receiving (incoming) mail server that you want to use. First, select the server type from the
drop-down list. If you don’t know which option to go with, select POP. This is by far the most common type of incoming mail server currently in use.:
6. Additional configuration fields will appear when you make the selection of server type. Enter the server address and username in the relevant fields. Click Check for Supported Types to find out what kind of authentication security, if any, your mail server uses. Following this, you should find that the details are filled in automatically. Click Forward to continue.
7. You might need to enter your mail password, depending on which server type you chose. In some cases, you’ll need to type this later when you download your mail for the first time. Click Forward to continue.
8. You’re given the chance to choose between various additional options, such as how often you want Evolution to check for new mail or whether you want to delete mail from the server after it has been downloaded. Unless you have been told otherwise or have special requirements, it should be OK to leave the default settings as they are. If you use a Microsoft Exchange server, you may need to enter the Active Directory/Global Address List server details here. Click Forward to continue.
9. Depending on the server type you chose, you might now need to fill in the outgoing (SMTP) server address. Type this into the Server field. If your SMTP server requires authentication, put a check in the relevant box and then enter your username. Once again, you can click the Check for Supported Types button to automatically fill in the authentication details. Click Forward to
continue.
10. You’re invited to enter a name for the account. This is the account name you will see when you use Evolution. The default is your e-mail address, but you can type something more memorable if you wish. Click Forward to continue.
11. Finally, choose your location, which will have the effect of automatically defining your time zone. This will ensure that e-mail messages are correctly time-stamped. You can choose your location from the Selection drop-down list (choose the nearest large city in your time zone), or click your location on the map. As during initial installation of Ubuntu, the map will zoom in when you click continents, allowing you to more precisely click the place where you live. Click Forward to continue, and then click the Apply button to finish the wizard.
Sending and Receiving E-Mail
After Evolution has been set up correctly to work with your e-mail servers, you can simply click the Send/Receive button on the toolbar to connect to the server(s) and both send and receive e-mail. You may need to enter your password if you didn’t enter it during setup. You can select the Remember Password check box in Account Preferences (Edit ➤ Preferences) to avoid having to type your password again, but the password will then be stored on your hard disk, posing a security risk if other people have access to your PC.
Any outstanding mail is sent first, and then the receiving procedure is started. a status dialog box will tell you how many messages there are and the progress of the download. Clicking the Cancel button will stop the procedure (although some messages may already have been downloaded). When you get a new e-mail message, an envelope icon will blink in the notification area in the top right of the desktop, and a small window will appear to tell you that you have mail.
Reading E-Mail
Simply click an e-mail message to view it in the preview pane at the bottom of the screen. Alternatively, you can double-click a message to open it in its own program window (selecting a message and pressing Enter will have the same effect).
As with most e-mail clients, any unread messages in the list appear in bold, and messages that have been read appear in ordinary type. By default, each message is marked as read after 1.5 seconds, but you can alter this value. To change it, click Edit ➤ Preferences, click the Mail Preferences icon in the Preferences dialog box, click the General tab, and then change the value under the Message Display heading. A value of 0 will cause the mail to switch to “read” status as soon as it’s clicked, which can be useful if you want to quickly clear a lot of messages.
You can also mark many messages as read by highlighting them all, right-clicking an individual one, and selecting Mark As Read from the menu that appears. You can select multiple messages in the usual way: Shift-click to select a consecutive list, or Ctrl-click for nonconsecutive selections. The Show drop- down menu, above the e-mail list, can be used to display only unread mail, which is great if you have a lot of messages that you’re not going to read and want to mark them as read or delete them.
Deleting Messages
You can delete messages by highlighting them and pressing the Delete key. Alternatively, right-click any message (or a selection of them) and select Delete. The message will then be moved to the Trash folder. To empty the Trash folder, right-click the folder and select Empty Trash.
If you move any messages from folder to folder, as described later in the “Sorting and Filtering Messages” section, a copy of the mail will end up in the Trash folder. This is because Evolution doesn’t literally move messages. Instead, it copies them from the old to the new location and deletes the original. This can be a little disconcerting at first, but there’s nothing to worry about. The mail message will remain wherever you moved it, and it won’t disappear.
Flagging Messages
You can flag messages in a variety of ways to help remind you of their status or purpose. The simplest form of flagging is to mark a message as important: right-click the message and select Mark As Important, or click in the space beneath the Important column (this is located to the left of the From column). This will add an exclamation mark symbol alongside the message.
Alternatively, you can add several different flags by right-clicking a message and selecting Mark for Follow Up. The choices, which can be selected from the Flag drop-down list in the dialog box that appears, range from Do Not Forward to No Response Necessary and Review. This heading will then appear in the message preview at the bottom of the window whenever the message is selected. If you prefer a simple color-coding scheme, you can mark up a message by right-clicking it and selecting Label. Then assign a color. As you’ll see, each color relates to a key word or phrase. You can edit both the colors and the key phrases by clicking Edit ➤ Preferences, clicking Mail Preferences on the left of the dialog box, and clicking the Labels tab.
Composing a Message
Creating a new e-mail message is as simple as clicking the New button at the top left of Evolution’s program window. Fill in the To and Subject details as usual, and then type in the main body of the message.
To add a CC or BCC, click the To button, and select addresses from your contacts list in the dialog box that appears (selecting the CC or BCC button as appropriate). Alternatively, if you would like to have the CC and BCC fields visible and available at all times, click their entries under the View menu of the Compose a Message window.
As with most Microsoft mail programs, new e-mail can be sent either as plain text or as HTML. Plain text mode is the default. To switch to HTML, click the entry on the Format menu. The advantage of HTML mail is that you can vary the style, size, and coloring of text, so you can emphasize various words or paragraphs, as illustrated in Figure 14-5. In addition, if you click Insert ➤ Image, you can insert pictures from the hard disk. Other options on the Insert menu let you insert tables, dividing lines (click the Rule menu entry), and web links.
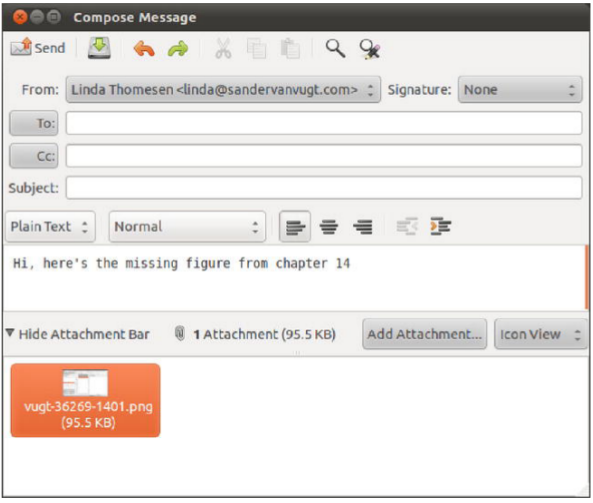
Figure . New messages can be formatted in HTML, allowing you to format text and even add images to
your messages.
The disadvantage of HTML e-mail is that the person receiving the message will need an HTML- compatible e-mail program to be able to read it (though most common e-mail programs can handle HTML e-mail just fine). Your mail is also more likely to be tagged as spam by the recipient’s server, because of the widespread abuse of HTML and images in mail by spammers.
Words are automatically spell-checked in the new e-mail, and are underlined in red if the spell-checker thinks they are incorrect. To correct the word, right-click it and then select the correct spelling from the list provided.
By default, if you chose the English language during the installation of Ubuntu, the Evolution spell-checker will offer only an English (American) dictionary. You can switch to other English dialects (e.g., British, Canadian, or Australian English) by choosing Edit ➤ Preferences in the main Evolution window, clicking the Composer Preferences icon, and then clicking the Spell Checking tab. Select an alternative dictionary or multiple dictionaries by selecting the check boxes to the left of the dictionary names.
Creating an E-Mail Signature
E-mail signatures are the blocks of text that appear automatically at the end of new e-mail messages you compose. They save you the bother of typing your name and contact details each time. To create an e-mail signature, follow these steps:
1. Click Edit ➤ Preferences. Select Composer Preferences from the left side of the dialog box and click the Signatures tab.
2. Click the Add button at the top right of the dialog box.
3. In the Edit Signature dialog box, type what you want to appear as your signature. The signature can be in either plain text or HTML (click Format ➤ HTML for the latter). Don’t forget that in HTML mode, you can insert lines (Insert ➤ Rule), which can act as a natural divider at the top of your signature to separate it from the body of the e-mail.
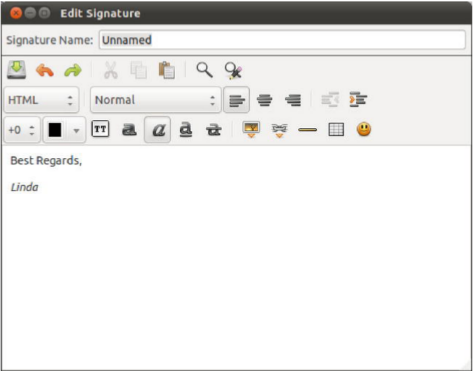
Figure . Creating an e-mail signature saves you from having to type your contact details each time.
4. Click the Save and Close icon at the top left.
5. Click Mail Accounts in the Preferences dialog box, and double-click your mail account in the list on the right side.
6. In the dialog box that appears, ensure that the Identity tab is selected and click the Signature drop-down list. Click the signature you just created.
7. Click OK and then Close in the Preferences dialog box. Your new signature will then automatically appear in new messages. It’s possible to create multiple signatures—for instance, one for work and one for personal e-mail—and then choose the appropriate signature when writing your e-mail.